Makerspaces are still all the buzz and for many reasons they should be. I often state it is the start to changing how schools will operate because makerspaces are the one place in school that do not feel like school. This is the reason why students and educators all over the world love them. In these spaces real learning is happening and not just education(two very different words often used back and forth).
As we head back to school and begin to prepare for another school year(I know many of you have already started) it is time to think about our learning spaces. This summer I decided that I was going to add a few color splashes to the Coffeechug Cafe to give it a less industrial feel and more welcoming to hopefully bring in more students.
There are so many amazing ideas and things to buy online to get you started, but that really goes against the essence of a Makerspace culture doesn’t it?
I decided to make a sign of my own from scratch. I am far from a expert when it comes to tools and decorating so if I can do it you can too!
Step 1: Find some scrap wood or buy some cheap boards like particle board or fiberboards. In my case I had a bunch of these sheets of scrap wood from an old project.

Step 2: In my case I cut the boards to create 2×2 foot piece. Using a vinyl cutter and 12×12 sheets of vinyl I knew it would be easy to center and apply the letters I wanted to add to the picture. Using a table saw I marked my lines and cut them to size.
Step 3: Once the boards were cut to size, I applied two coats of a white paint with primer as I wanted white as the backdrop. You can pick whatever color you would like for your sign.

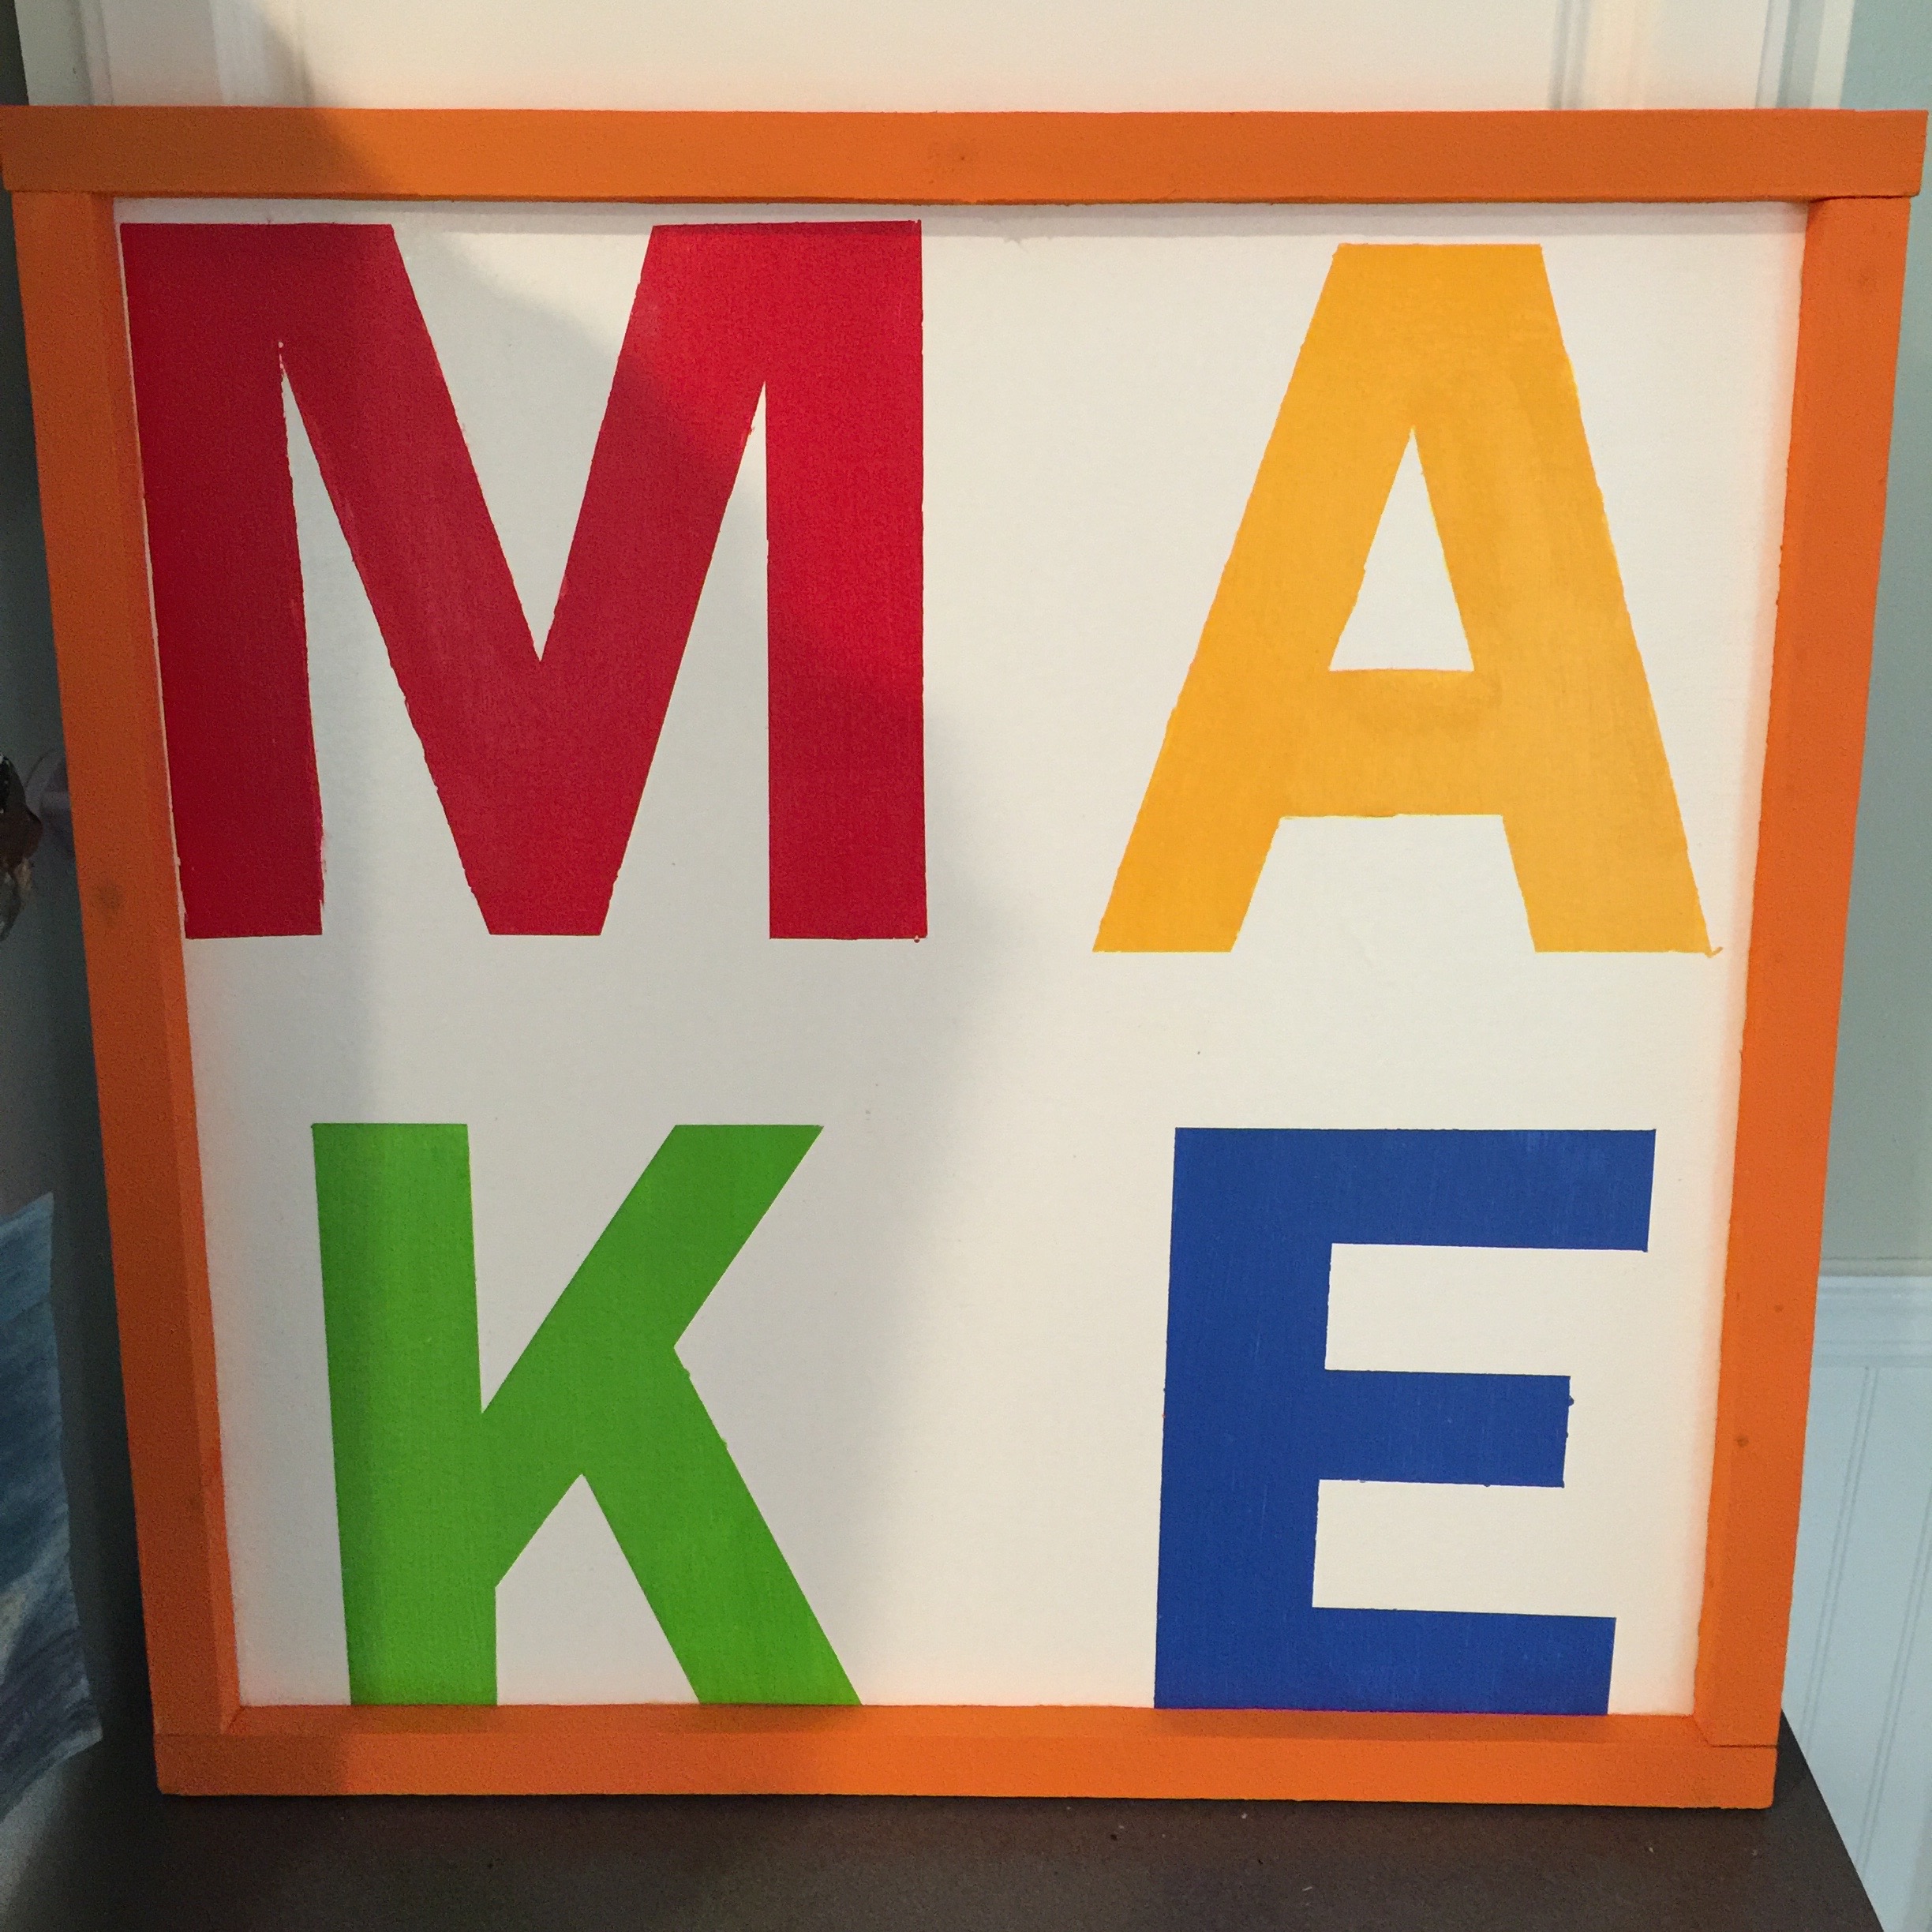
Step 4: I opened up the the Silhouette Cameo software and typed the letter M onto the page. I sifted through all the fonts until I found one that I liked and stretched it out to be as large as I could on a 12 x 12 sheet of vinyl.
**Be sure to center the letter and line up your vinyl properly**
Repeat this process for each letter. In my case I was spelling the word MAKE so I swapped out each letter and cut them out accordingly using this same process.
Step 5: Pick out the letters from the vinyl. We are making a stencil so the letter itself is not needed. Once you have the letters picked out, then pull back the vinyl and apply each sheet to the board. These act as stencils. We can now paint the letters without risk of messing up the white paint.

Step 6: Decide what paint colors you would like to use. We used the cheap acrylic paint that we had sitting around. There are a ton of color varieties so make sure you are organized. Who knew there were so many shades of red?

Step 7: Paint. Decide how many coats of paint you want depending on if you want the brush strokes to be seen or letters to be solid. You come up with your own artistic touch. For me, I painted two coats for an in between feel.


Step 8: Peel the vinyl. It is time to pull back the vinyl. Go SLOW! I went too fast and because of this the paint from the letters tore off around the edges. EEK!(see the edges of the M and A!!!)


Step 9: Repair. I used a straight edge and repainted where the paint ripped off. Be patient and take your time. No rushing! Patience is a virtue and it will pay off!

Step 10: Next is building a frame. I took some old pieces of 1 x 4 boards I had sitting around and cut them into 1 x 1 strips using the table saw. I measured and marked the lengths of each side and cut them to size to make sure it was all good.

Step 11: Paint the frame. I used acrylic paint once again to paint the frames a nice bright orange. Of course when they dry you now have a keyboard to sing the ABC’s!

Step 12: Glue the frame! I used wood glue and glued the frame down to the board. I glued one piece at a time and used clamps to hold them in place. Be sure to have a damp cloth to wipe off excess glue. If you want you could also staple from the backside if you want more support. 
Step 13: Hang and enjoy! I will update once I have it up in my makerspace, but I will be using the 3M strips to hold on the wall. I have to wait as I am organizing my room as I found out I am sharing the room with another educator this year.
I hope you enjoyed this piece and let me know if you have questions. More importantly let us be sure we don’t only do lip service about education ideas, but lead by actions. Get out there and make something. And then please share your work as I love being inspired by others and learning new ideas!
Great post and thanks for the directions! Our middle school recently purchased a Makerspace last year. Can’t wait to show this to our STEM classes and try it out for myself.
Awesome! I would love to see your examples if and when you make them. Please share and don’t hesitate to reach out for any questions you have.