For our summer camp teaching students robotics with the LEGO EV3 Platform we wanted to spruce up our dragster challenge. I decided to build a 15 foot PVC course that will help all stages of learning.
The pros of using PVC is that it will help the dragsters stay in bounds to help those who builds tend to not go straight. It will also allow us to add some really cool add on features(see below). Additionally, PVC is easy to assemble and break down allowing us to use for future events in the area.
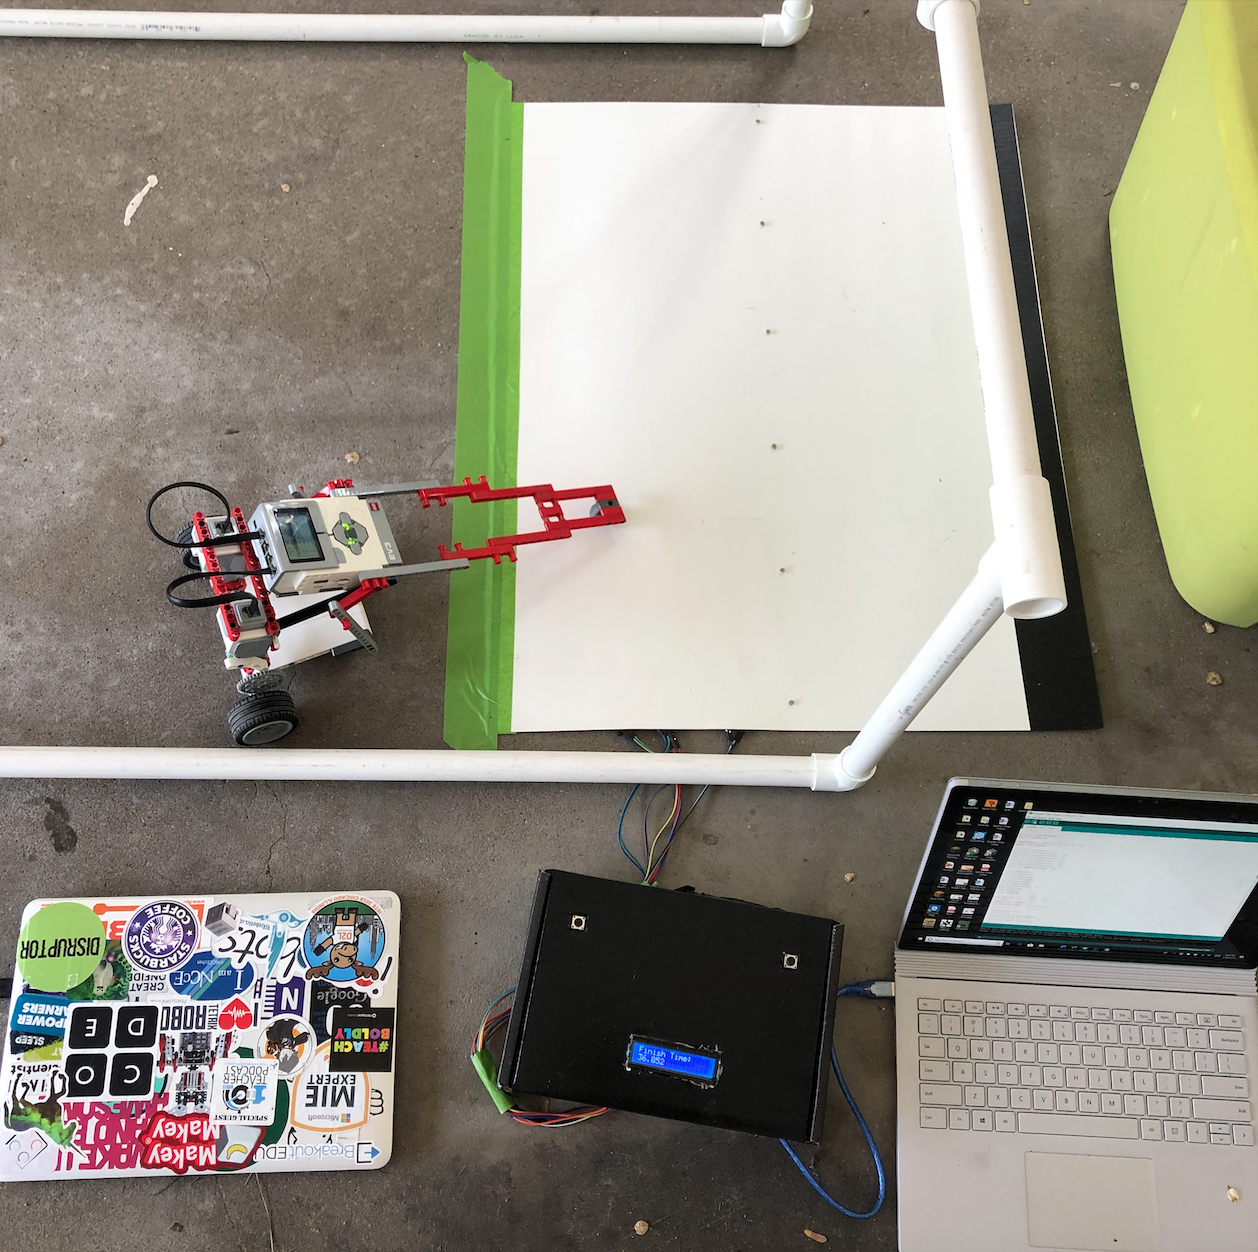
I wanted to build a finish line that would display time when the robot crossed it and I decided to challenge myself by using Arduino and photoresistors. What I created was a 6 photoresistor finish line that when the dragster goes over any one of the them it will trigger the end of the run.
I struggled like no other to build and code this project. I built several models, dealt with mutliple setbacks, and finally on my 3rd design and learning to code I have one that works!
At this point in time I have a reset button that will wipe out the time and prepare for the next race. The second button when pressed begins the time. For now, We will count down 3-2-1 and engage the button. This will be when the students start their dragster and once it reaches the finish line it will display the time.
You will note in the video I have black tape on the end of the poster board. The requirement will be that the dragster will come to a stop when it senses black. In the video my dragster does not do this, but it will in the future video.
The video below documents how I built the finish line.
Here is a snapshot of my TinkerCad Circuit Design so you can copy what I built with the Arduino. If you want access to my actual TinkerCad design, then please reach out to me and I will share.

Here is the code I wrote and remixed from another project.
Finally, here are the upgrades I plan on adding over the summer when I have time
- Start Gate – typically we have our dragsters begin once a board from behind drops. I plan on creating the same using a servo motor that will lift a piece of cardboard that will trigger the dragster to begin.
- Lights on Start – the next step will be to add a countdown light so that when the light reaches green, the board will drop and the race begins.
- Lights along the PVC so as the dragster moves down the course neopixels will light up showcasing the distance on the track.
- Cameras to livefeed the races. You will notice the T pieces mounted at the start, middle, and, end. These will have cameras so that we can display the races on a screen.
If you have any questions please let me know. Otherwise, look for updates this summer and for this to be used during our robotics summer camp.
Here is the link to the challenge page for our summer robotics dragster project.
Leave a Reply